But what happens when a student with a print disability depends on those formats in order to have access to the text...and it's not available for purchase in that format? Enter Disability Resources! I'm going to focus in this post on how we create those formats in response to some colleague questions. Info on the legalities and suchlike for our students is available elsewhere.
There is one big caveat that is unique to eReader formats. In order to comply with copyright law, we make a good-faith effort check for commercial sources of the required format before producing our own. That means for Kindle-using students we check Amazon. For iPad and Nook users, we check iBooks, Barnes and Noble, and Open Library. If we can't find a commercially available format, we go ahead.
Workflow for Creating Accessible eReader Formats
These instructions assume that you have a PDF or TIF of the book, either provided by the publisher or scanned yourself. You will need optical character recognition software, Word (or OpenOffice, though these instructions assume you're using Word), and the free software Calibre.Using a raw PDF with Calibre will give you highly unsatisfactory results. Trust me. I tried it.
- Convert the source (PDF or TIF) to a .doc or .rtf with Optical Character Recognition (OCR) software. We use Omnipage. Other colleagues swear by Abby FineReader. Either will get the job done just fine. We include page numbers (for citing and synchronizing with the syllabus) but leave out running page headers/footers so as not to interrupt the flow of the text. We also include content-based images (diagrams, etc.) but leave out the eye candy images.
- In Word, mark each chapter number/title as Heading 1 using styles, making sure to include the word "chapter" within that style. Add it, if the original text doesn't include it. I also add "Chapter: Front Matter" right after the copyright page and "Chapter: End Matter" before any, well, end matter, and also mark these as Heading 1. Calibre will use these to create a clickable table of contents.
- We usually process each chapter as a separate file. At this point, combine all the book files into one. (I use Insert>>Text from File) Save as one .docx file.
- Save as a Web Page, Filtered file.
- Open Calibre and click the Add Books icon
- Select the .html file you just saved in step 4
- Click Edit Metadata icon
- In the IDs field, add the ISBN and click Download Metadata. This may take a couple of tries, as the search can get a bit wonky for books with multiple editions or from small publishers. When satisfied, click Ok.
- Click Convert Books. There are some items here that will make the book more easily navigable.
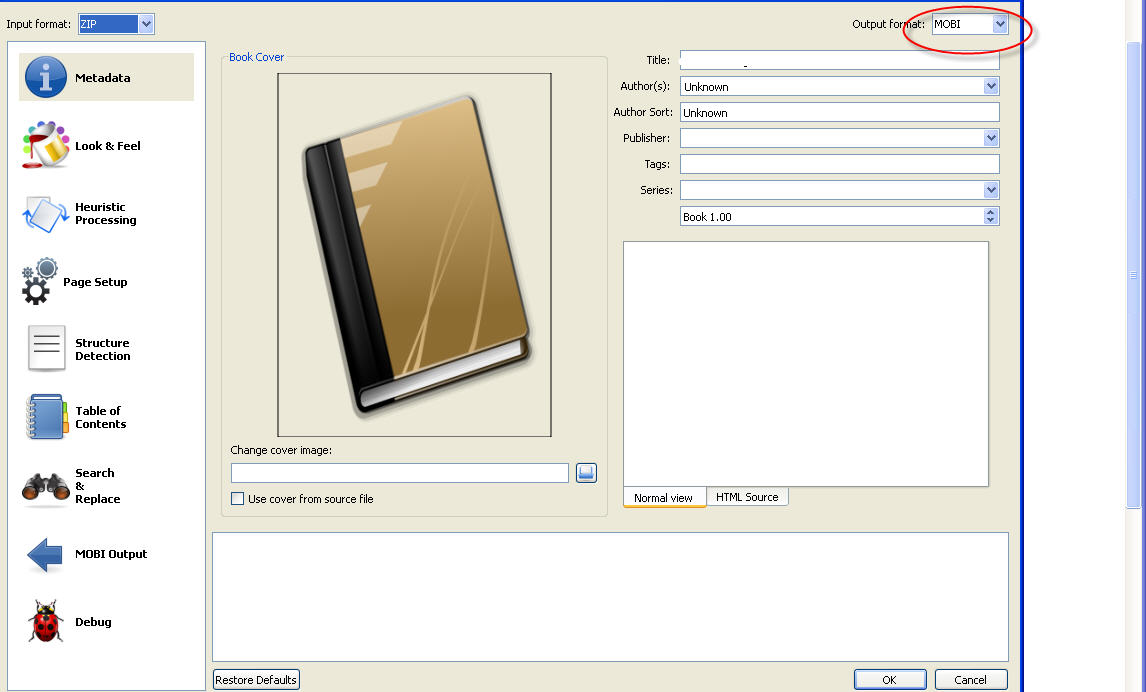
- Select the correct output format. For a Kindle, this will be MOBI. For an iPad or Nook, it will be ePUB.

- Click on Look and Feel. Click the magic wand icon, then choose the Use Default Values button and Ok. Select Remove spacing between paragraphs and make sure Keep ligatures is unselected (or it will completely mess up the text to speech)

- Click on Page Setup and choose the appropriate settings for the intended device (this should be pretty self-explanatory when you look at it)
- Click on Table of Contents and select Force use of auto-generated Table of Contents
- Click on __ (MOBI or ePUB) Output and select Put generated Table of Contents at start of book instead of end
- Click OK. A spinny icon at the bottom right will let you know that the conversion is taking place. Give it some time. When it's finished, the new format will show as available. You can then use the Click to open path link to figure out where your new file is stored.

- For Kindle files, it's important to know to store this new book in the Documents folder - otherwise it won't show up.


No comments:
Post a Comment